miércoles, 28 de marzo de 2012

Pecan and Pistachio Chocolate Chip Fingers


I almost always have cookies in my freezer for emergencies, but I had just gotten back from vacation and found out that I was the only one making dessert for a fundraiser celebration that I recently attended. I had frozen a cake beforemy trip, but didn't have time to make anything else, and my freezer was totally void of cookies. The party was at 7 and it was about 4 when I got this news. I wanted t make a simple dessert but didn't want to make brownies or chocolate chip cookies, both of which could have been done in the time allotted. Most of my cookies need chilling time, so I knew they were out, but I do have a lovely Heath bits cookie in my book, and I thought that would be perfect. The only problem was that I didn't have time to shop for Heath bits and didn't have them in my cupboard. What I did have in my freezer, however, was a small bag of left over baklava filling. I thought this might make a very interesting variation on my original recipe, and I wasn't disappointed. The cookies were crispy, buttery and had an unusual flavor due to the pistachios in the recipe.
2-1/2 sticks butter (10 ounces), room temperature
1 cup + 2 tablespoons sugar

2 large egg yolks, room temperature
3 cups (390 grams) unbleached all purpose flour, fluffed, scooped and leveled
1 teaspoon vanilla
1 cup mixed nuts, chopped finely by hand or in processor
1/2 cup mini-chocolate chips

1/2 teaspoon cinnamon

1/4 cup Ghirardelli Sweet Ground Chocolate and Cocoa, for dusting
OR
Decorating Glaze
1/4 cup (2 ounces) mini-chocolate chips
1 teaspoon oil
Preheat the oven to 350 degrees F. with shelves in the upper and lower thirds of the oven. Line 2 cookie sheets with parchment paper.

In a mixing bowl, beat the butter and sugar, just until blended. Beat in the vanilla and egg yolks, one at a time until well blended. Beat in the flour, a cup at a time (If you don't have a heavy-duty stand mixer, stir in the flour by hand.).  Stir together the nuts, choclate chips and cinnamon.  Stir this into the dough.

Shaping the cookies:
1. Use your hand to measure the ball size to about 1 inch.

2. Roll the ball in your palms in a circular motion to make it round and smooth.
3. Roll the ball into a log-shape by moving your hands back forth, parallel to each other.


4. Use your palm size to measure the length of the cookie to about 2-1/2-inches long. They will double in width, so go for a thinner, longer shape.
Transfer the cookies to the prepared cookie sheets, leaving about 2-inches between cookies.

Place the cookie sheets on the two shelves of the oven and bake for a total of 12-14 minutes, switching the pans from top to bottom, etc. after half of the cooking time.

Remove the cookie sheets and slide the parchment onto cooling racks to let the cookies cool for 5 minutes. Reduce the oven temperature to 275 degrees. When the temperature has come down, slide the parchment paper back on the cookie sheets and bake the cookies for another 10 minutes. Remove and cool, as above for about 5 minutes.

While the cookies are slightly warm, put the ground chocolate/cocoa into a strainer or sugar-shaker, and dust the tops of the cookies with the chocolate mixture.  Let the cookies cool completely before eating.

If you'd like to decorate them as shown in the opening photo, place the chocolate chips and oil in a small microwave-safe container. Micro-cook on medium power (5) for 1 minute. Stir until the chocolate is completely melted.

For this amount of glaze, you'll need a very small piping bag. You can make one out of a plastic storage or zip-top bag. Cut the bag in half, horizontally.
Put the bag into a small glass, and then fill the bag.


Hold the bag closed at the top, with the filled part resting in your palm, and your thumb and index finger holding the top (you can put a rubber band around the top if it is easier). Gently squeeze the filling toward the tip.


Make a very tiny cut in the tip with scissors. Pipe on the decoration.


These cookies keep for several days at room temperature, in a covered container. They may also be frozen in a covered container, with waxed paper between layers. This way you'll be able to defrost each cookie individually. They'll keep frozen for 3 months. Defrost them at room temperature, uncovered.

sábado, 24 de marzo de 2012

viernes, 16 de marzo de 2012

PARUPPU THOGAYAL

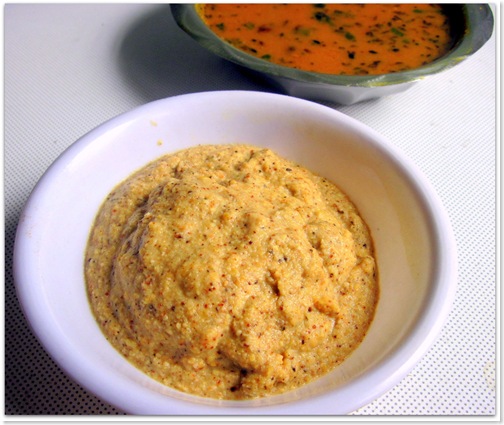
This is my husband's favorite thogayal. It tastes the best when paired with vatral kuzhambu . Its is a delectable combination.

paruppu thogayal 1

INGREDIENTS

  • Moong dal - 1 fistful
  • Toor dal - 1 fistful
  • Red chilly - 2 nos medium sized ( 1 if long)
  • Grated coconut - 1 tbsp ( optional)
  • Pepper corns - 1 tsp
  • Garlic cloves - 6 nos
  • Salt - As reqd

METHOD

  • Take a kadai and add a tbsp of oil. Fry the dals along with red chillies.
  • Once its cool grind adding salt , grated coconut and little water to make a paste.
  • Finally add the pepper corns and garlic cloves and grind well .
  • Add little water if required.

Mix with plain rice adding sesame oil ..Enjoy !!


viernes, 9 de marzo de 2012

Dukka (or Dukkah)


If you're someone who never manages to use up the nuts or spices you buy for a recipe dukka (aka dukkah) could be your salvation. Basically it's a ground up mixture of roasted nuts, spices and dried herbs in which to dunk bread or raw vegetables. It appears to originate from Egypt though has become very fashionable in Australia. And it's dead tasty.

To keep down the cost if you're making it from scratch buy one of those packs of mixed chopped nuts. I'm not mad about their flavour normally but if you roast them and mix them with spices they taste fine - just nicely nutty. And - hopefully it doesn't need saying by now - buy your spices from a ethnic grocer rather than from the supermarket. You'll pay a fraction of the price.

Makes about 250g mix - enough to feed a group of six to eight though obviously check no-one has a nut allergy.

100g chopped mixed nuts
75g sesame seeds
25g coriander seeds
10-12g cumin seeds
1 level tsp dried oregano
1 level tsp sea salt
1/2 tsp black peppercorns

Preheat the oven to 180°C/350°F/Gas 4

Spread the nuts and seeds on separate baking trays or tins and roast them in the oven until lightly coloured and fragrant - about 7-8 minutes for the nuts, 4-5 minutes for the coriander and seeds and 3-4 minutes for the sesame seeds. (It might sound a faff roasting them separately but you don't want to overcook them. You could toast the cumin seeds in a dry frying pan if you like. The main thing is to watch them like a hawk).

Set the nuts and spices aside to cool. Put the nuts and peppercorns into a food processor or spice grinder, pulse a few times then add the coriander, cumin and sesame seeds and oregano and salt and pulse again. Don't overdo it - you want a rough textured mixture that looks like coarse breadcrumbs (see below). If you haven't got a food processor you could use a pestle and mortar to grind everything up but that's obviously harder work.

Serve with good olive oil, chunks of bread or warm pitta bread and raw veg like carrots and radishes. It's also great as a sprinkle over roast vegetables or you can use it as a coating for soft goats' cheeses - or a topping for roast fish. You could add a few chilli flakes if you want to spice it up but this version is better for kids (provided, just to stress it again, they're not allergic to nuts).

You can keep any leftover dukka for a week or two in an airtight tin or plastic box though you might want to refresh it in the oven for 2-3 minutes before you serve it.


By the way the beetroot dip in the rather messy pic above (suddenly remembered I should snap it half way through eating it) is made from a couple of vac-packed beets - a recipe I adapted from Stephen Markwick's A Well-Run Kitchen. You simply chop them up and whizz them with 2 tbsp Greek yoghurt, 1 tbsp balsamic vinegar, about a teaspoon of ground roast cumin, a pinch of hot pimenton or cayenne pepper and 3 tbsp olive oil and season well with salt and pepper.

jueves, 8 de marzo de 2012

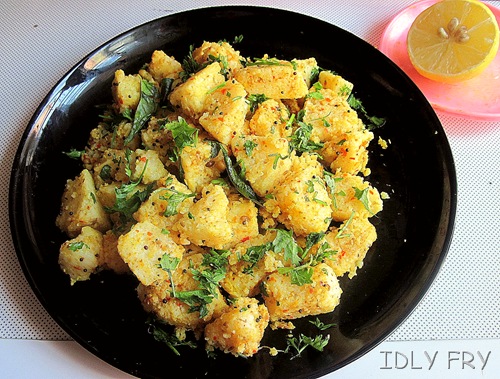
IDLY FRY - VERSION 2

Recently my MIL was telling about the idly fry she had in her brother's place. I was attracted by the simple recipe and we tried with the left over idlies.It was very nice & tasty. Usually i add G&G , garam masala to make the fry. But this version is completely different from mine.No need to deep fry the idlies too. So its an easy & low calorie food.Do try this let me know friends.

idly fry masala

INGREDIENTS :

  • Left over idlies - 15 nos
  • Sesame oil - 2 tbsp
  • Salt - As needed.

To roast & grind :

  • Coriander seeds - 1 tbsp
  • Red chilly - 4 nos ( long variety )
  • Grated Coconut - 1 tbsp
  • Small onion - 10 nos or Big onion - 1 no
  • Jeera / cumin seeds- 1/2 tsp
  • Cooking Oil - 1tsp

To temper :

  • Mustard seeds - 1 tsp
  • Urad dal - 1 tbsp
  • Channa dal - 1 tsbp
  • Curry leaves - few
  • Cooking oil -  1tbsp

To garnish :

  • Coriander leaves - few

Lemon juice - few drops to taste.

METHOD :

  • Heat oil in a kadai and roast the items given under 'To roast & grind ' except coconut.
  • Grind all the roasted items along with grated coconut.Add little water & grind to a smooth paste.Set aside.
  • Cut the idlies into small cubes.Mix the ground paste and toss well. Take care the idly pieces should not break.
  • In a wide mouthed kadai , add oil and temper the items given above .
  • Now add the masala coated idly pieces and saute well for few minutes by simmering the flame.Saute till the raw smell of masala disappears.
  • Switch off the flame and add the lemon juice.
  • Garnish with coriander leaves.

Serve hot !!


lunes, 5 de marzo de 2012

http://feedproxy.google.com/~r/SpanishRecipesinpictures/~3/dbCweQncHxo/butter-cookies.html

These are some of the cookies I prepared during the Xmas Holidays. I wanted to try a new dessert...

Get the rest in my blog! See you there!